


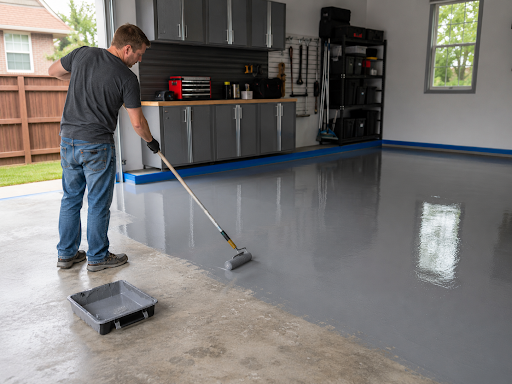
Old concrete can look pretty rough after years of cars, storage, spills, tools, and whatever else a garage or basement has thrown at it. That does not necessarily mean the slab needs to be replaced. If the concrete is still structurally sound, epoxy flooring can give it a dramatically cleaner, more finished appearance while creating a surface that is easier to maintain.
The important part is what happens before the epoxy goes down. Epoxy is not simply expensive floor paint that can be rolled over whatever is already there. Moisture, oil, old sealers, cracks, and poorly prepared concrete can all interfere with adhesion. If you want the finished floor to look good several years from now rather than just on installation day, start underneath the shine.
1. Make Sure the Old Concrete Is Worth Coating
Begin by completely clearing the floor and inspecting the slab. Normal stains, small pits, and minor surface cracks can usually be addressed during preparation. Large cracks that continue to move, crumbling concrete, sections that have shifted vertically, or recurring water problems are different. Those conditions may require concrete repair before an epoxy coating should even be considered.
Also determine whether the floor has previously been painted or sealed. Sprinkle a little water over several areas of bare concrete. If it soaks in, the surface is generally porous. If the water beads and remains on top, there may be a sealer or another coating present that needs to be removed before the epoxy can bond properly.
2. Check for Moisture Before You Cover the Slab
A concrete floor can look perfectly dry while moisture is still moving through it from below. That matters because coating a slab with excessive moisture can lead to blistering, peeling, discoloration, or loss of adhesion. Sherwin-Williams recommends that concrete be sound, dry, clean, and properly prepared before coatings are applied. You can review its concrete surface preparation guidance before beginning.
For a basic preliminary check, many flooring manufacturers recommend securely taping plastic sheeting to bare concrete and watching for condensation or darkening beneath it. If the slab has a history of dampness, however, a more formal moisture test is a better investment. Epoxy should not be used as a way to hide an existing water problem.
3. Clean More Thoroughly Than You Think You Need To
Oil and epoxy are not good roommates. Neither are grease, silicone, tire treatments, old adhesive, cleaning residue, or years of ground-in garage dirt. Sweep and vacuum the entire surface first, then use an appropriate concrete degreaser on contaminated areas. Stubborn automotive stains may require more than one treatment.
This is one of those home-improvement projects where the boring part determines whether the attractive part survives. Pay extra attention to corners, edges, and areas where vehicles have been parked. A little contamination left behind can become the weak spot where a coating eventually starts peeling.
4. Repair Cracks, Pits, and Damaged Areas
Once the concrete is clean, repair small cracks, chips, holes, and spalled areas with a patching compound that is compatible with the epoxy system you plan to use. Allow repairs to cure for the time specified by the manufacturer and grind or sand them smooth when necessary.
Do not expect the epoxy itself to erase every flaw. Most floor coatings follow the basic contours of the concrete underneath them, so a high repair, deep depression, or rough patch may still be visible after the finish is applied. If your garage is part of a larger makeover, our guide to turning a garage into a more polished and functional space can help you plan the floor along with storage, lighting, and the rest of the room.
5. Give the Concrete a Surface the Epoxy Can Grab
Clean concrete can still be too smooth for good adhesion. Older slabs often benefit from mechanical preparation such as diamond grinding, which removes weak surface material, old coatings, and some sealers while creating a slightly textured surface for the new coating. Thorough dust collection is important because the fine powder created during grinding should not be left underneath the epoxy.
Some DIY epoxy systems allow acid etching instead, but only use that approach when the manufacturer specifically recommends it. Different coatings have different preparation requirements, so this is not an area where one set of instructions works for every product. Rust-Oleum’s garage flooring resources are also useful for understanding how preparation changes depending on the coating system.
6. Plan the Entire Application Before You Start Mixing
Most epoxy floor coatings use two components, typically a resin and a hardener. Once those components are mixed, the clock starts. The usable period is known as the pot life, and when it ends, the material does not politely wait while you look for the missing roller tray.
Before mixing anything, have rollers, brushes, extension poles, decorative flakes, nonslip additives, and other supplies ready. Check the required floor and air temperatures, calculate your coverage, decide where you will begin, and most importantly, decide how you will get out of the room. Follow the manufacturer’s exact mixing ratio rather than adjusting it in hopes of making the epoxy cure faster.
7. Apply the Epoxy in Controlled Sections and Let It Cure
Cut in around walls, steps, columns, and other obstacles, then apply the main coating in sections that can comfortably be completed within the product’s working time. Maintain a wet edge as you work. If you are adding decorative flakes, broadcast them while the base coat is still wet so the pattern looks intentional rather than generous at one end of the garage and strangely sparse near the door.
A compatible clear topcoat can add protection and may also provide an opportunity to incorporate a slip-resistant additive. Most importantly, respect the full curing schedule. Dry to the touch, ready for foot traffic, and ready for a vehicle are three different things. Parking a car on the floor too early can undo a lot of very careful preparation.
Should You Choose Epoxy or Another Garage Floor Coating?
Epoxy remains a practical option for many protected interior concrete floors, particularly garages, workshops, utility rooms, and some basements. It offers a seamless finished appearance and can be customized with different colors, gloss levels, and decorative flakes. Traditional epoxy, however, is not automatically the right answer for every concrete surface, particularly areas exposed to significant moisture or prolonged sunlight.
Homeowners planning a garage-floor upgrade should also understand how epoxy compares with newer coating systems. Our polyurea vs. epoxy garage floor guide explains some of the differences before you commit to one system.
The Preparation Is What Makes the Floor Look Good
Installing epoxy over old concrete can produce one of those satisfying before-and-after transformations that makes an entire garage, basement, or workshop feel cleaner. But the epoxy itself is only part of the job. Moisture testing, degreasing, repairing, and profiling the concrete are what give the decorative finish a chance to last.
Take the extra time at the beginning, follow the exact installation requirements for the coating you choose, and resist the temptation to rush the curing period. Old concrete does not have to look old, but a beautiful epoxy floor starts with taking care of everything you eventually will not be able to see.

Pretty! This has been an incredibly wonderful post.
Thank you for supplying this info.
I’d like to find out more? I’d want to find out more details.
It’s an amazing piece of writing designed for all the internet viewers; they will obtain advantage from it I am sure.
Informative article, exactly what I needed.
This blog was… how do you say it? Relevant!!
Finally I have found something which helped me.
Thanks!
We’re so glad you found it helpful—thank you for the kind words! 🙌 If you have any questions about your vinyl floor install or need tips for your next project, feel free to ask. We’re here to help! 🛠️✨ #HomeImprovement #FlooringTips